Webopac Preferences – Profile Search Method
1. Introduction
The screens in this option show various tabs that you can use to define how the user performs a search in the Web OPAC. The standard tabs are: Search, Expert Search, Index search, and Search tree. If the thesaurus module has been implemented there will also be a tab Thesaurus.
For each search method you can define the options for searching.
For each search method, you can determine whether the search method is available. If not you can delete it from the profile:
· At the bottom of the screen, click the button
You cannot delete the initial Find and Browse method tabs.
You can add a new Find or Browse type of search.
· Click the or buttons
A new tab is added to the search methods. Configure this tab as descibed in section 2.
You can define options for each profile and for each language.
· Select the language for the profile from the drop-down menu
· Select the profile for which you want to make the changes

Languages are defined on the Start page.
2. Setup
For each of the tabs, the configuration screen is the same. You add or delete choices for the user, according to the type of search you want to present. So, for example, a simple Search may have no restrictions, whereas an Expert Search may have several restrictions offered.
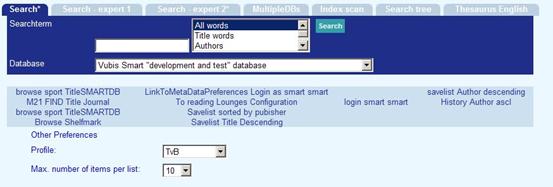
Indexes
You can specify whether the user has a choice of which index to use or not.

· Click the radio button to select which option is used.
· If Search term with choice of index is selected, indicate whether the user can search using more than one term.
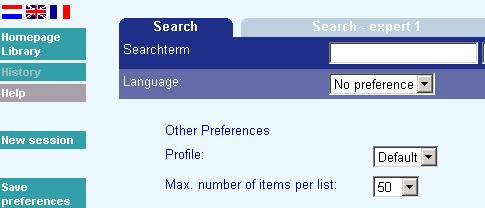
Example screen when Repeat search term + index is set to zero

Example screen when Repeat search term + index is set to 1

Example screen when Repeat search term + index is set to 2

Note
The maximum number of search indexes is 10.
Note
When creating search tabs where Boolean combinations between indexes are possible (see the previous screen shot), define the indexes available for selection to be of a similar mechanism type. Indexes using the “Personal name” mechanism should not be used where Boolean searches are possible.
Indexes per search method
This section allows you to decide whether to use the default index defined in Options (see above) or to define which indexes are available to search.
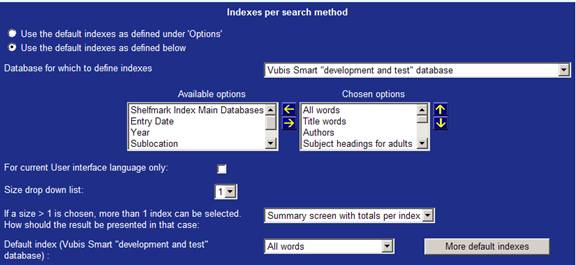
If you have multiple databases, these will show in a dropdown list next to "Database for which to define indexes".
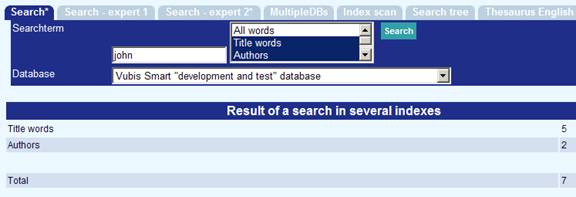
When you have a dropdown list size >1, you can choose the presentation: Summary screen with totals per index or list with all results.
Example of Summary screen with totals per index:
Database
Use this section to determine the default database, and whether the user can select another database or not.

When you choose , the following options are shown:

If a choice of multiple databases is possible, you can choose for either a drop down list or check boxes before the databases.
The button gives access to a more detailed level of parameterisation, enabling you to define:
· [a] which databases should be displayed
· [b] which indexes should be displayed.
As the system will now search in multiple database, it may well be that these databases do not have identical indexes. Therefore it is necessary that you define “index mappings”, i.e. which index from which database should be used if a “logical” index is selected.
Note
We make a distinction here between a “physical” index, which is the actual index, which is created on a per database basis, and a “logical” index, which does not exist as a physical index on disk, but which is just a mapping (or grouping) of physical indexes. If the system is configured for concurrent searching, the system displays the logical indexes, but does the actual searching for each database in the physical indexes.
These settings can be accessed through the button for each database definition.

What this actually means is the following:
· Four logical indexes have been defined. They have been named “Keyword”, “Author”, “All words” and “Title word”.
· The screen shot shows the mapping for each of these logical indexes for searches in the database “Technische Universiteit Eindhoven” (see title bar).
· Example: a search in the logical index “Keyword” uses the physical index “Trefwoord” of database “Technische Universiteit Eindhoven”
Notes
This feature is only available for Find searches, and not for Browse searches.
The feature can also be used to allow concurrent searches in multiple partial indexes, and thus not only in multiple databases.
Spread of search results
For the display of the search results in record lists, the system offers two options:
1.
The record list is displayed immediately, and the search results from all selected databases are concatenated.
2.
The system displays an overview screen that shows how much records were found in each database.
The latter intermediate screen looks as follows:
The user can now select either the results from one of the selected databases, or the total result.
Restrictions
Use this section to determine whether restrictions can be applied to the search, and how many columns they display in.

For a simple search, you may wish to prevent any restrictions being offered.
Size drop-down list
Use this section, if restrictions are allowed, to determine the size of the drop-down menu box.
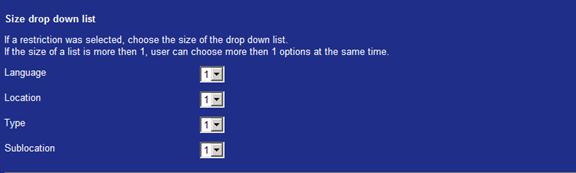
For example, if you select 1 for Language, the default text will be displayed in the drop-down menu:

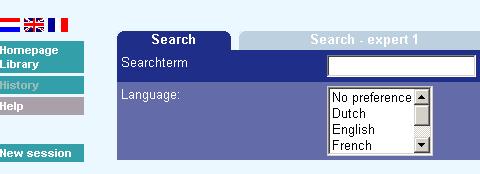
If you select 4, the size of the box increases so that four language options will be displayed:

Display of restriction drop-down menus
If the three restrictions for Language, Location, and Material Type are all selected, tick this checkbox to display those particular drop-down menus in a line.

The Start page Search will look similar to this:

Any further restrictions will be displayed underneath these three restrictions:

Do not tick this checkbox if you do not want the three restrictions to display in a line.
The Start page Search will look similar to this:

Any further restrictions will be displayed below these three restrictions:

Labels for search

· Enter a name for the search method in the Name search method text box. (this name appears on the tab)
· Enter a label for the search term in the Label for search term text box, this appears to the left of the box where the search term is entered.
· Enter the width of the input box in the Width of the input box text box.
· Enter a caption for the Search button in the Caption for search button text box.
· Enter the style class for the buttons in the Style class text boxes.
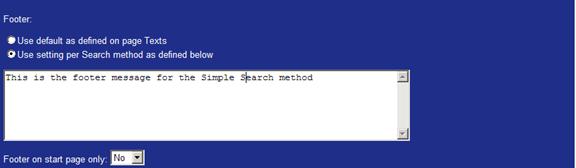
Footer
You can decide whether you want to use the footer as defined on the Texts (per Profile) page also as footer on search screens or whether you want an individual footer for each search tab or a combination thereof. You can also define an "empty" footer, to prevent the generic footer text from appearing on a search tab.
When you define a separate footer for a search tab, you can also specify whether this should only appear on the initial search tab screen or also on all subsequent screens.
This is especially meant for customers that have Aquabrowser in one of the tabs. They may not want a footer text on that tab.
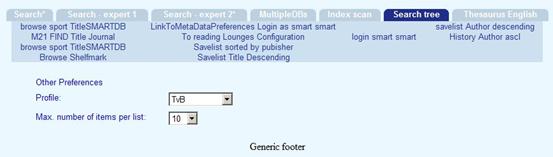
Order of search methods
You can determine in what order the tabs are displayed for the search methods.

· Use the up and down arrows to change the order of the search methods
· Enter the default search method from the drop-down menu. This is the search method that will be presented on the Start page.
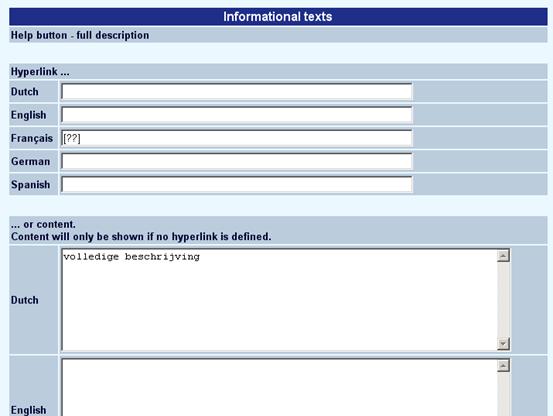
Informational texts
You can add information and help pages for the user.

· Move the mouse cursor to one of the terms you want to add help text for and click the left mouse button. A dialog window is displayed.
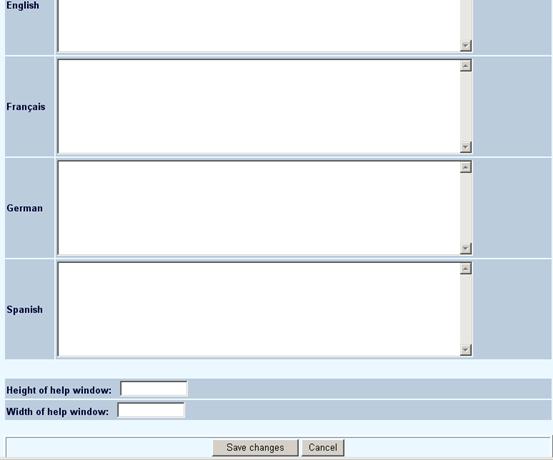
· Add help text in any of the languages used. You can use HTML code to make the texts more legible.
· Determine the size of the help pop-up screen in which the help text will be shown.
· Instead of inputting text, you can also specify the url of a help document for the button help.
For more information on constructing Help pages, please consult your Infor representative.
Note
Always remember to click the button to save any changes you have made.

3. Search trees
The setup for search tree tabs is slightly different:

This allows you to specify that a search tree is in use, the tree definition to be used on this tab and the page where the tree must appear.
Additionally you can specify that a given search tree must appear on the start page of the given search method tabs. For example:
Search tree tab
Search tab without Search tree on

Search tab with Search tree on
From the initial Search tree tab, you only have the option to add another Search tree tab. Once more than one Search tree tab has been defined, you will also see an option to delete a Search tree tab. You cannot delete the initial Search tree tab.

Note
Always remember to click the button to save any changes you have made.
